The Ultimate Christmas Pinwheel Cookies: A Festive Holiday Masterpiece
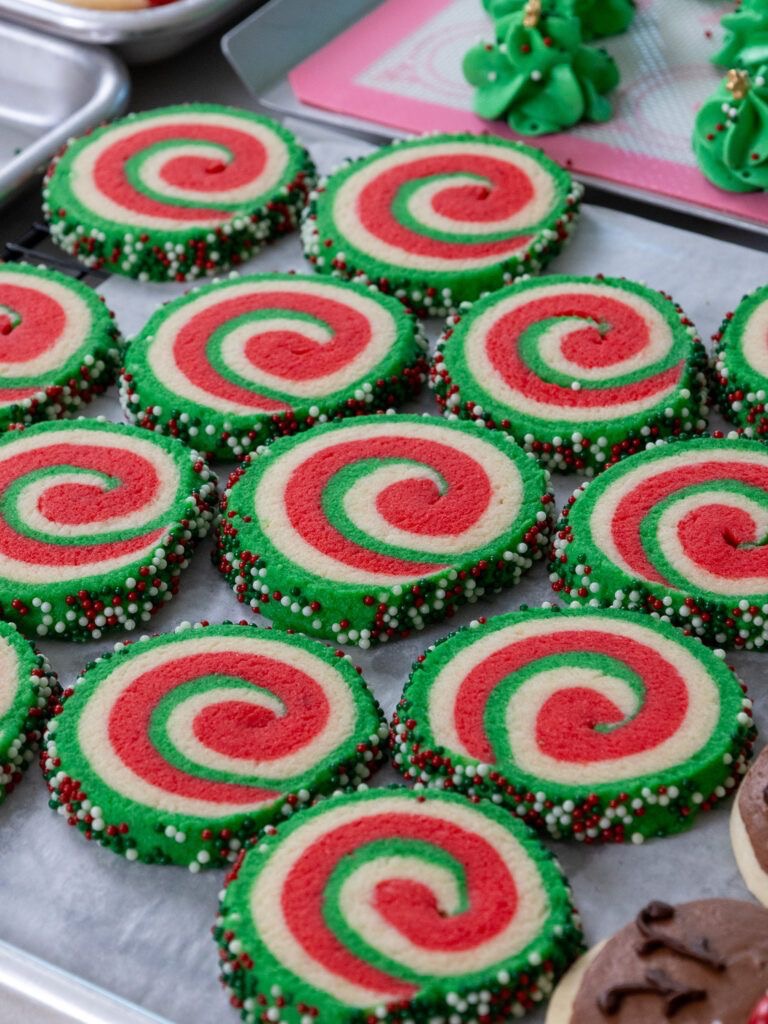
When the air turns crisp and the scent of pine fills the home, nothing captures the spirit of the season quite like a tray of vibrant Christmas Pinwheel Cookies. These eye-catching treats are more than just a dessert; they are a holiday tradition brought to life through swirls of festive red, green, and cream-colored dough.
What makes these cookies truly irresistible is the perfect balance of a buttery, melt-in-your-mouth texture and a classic vanilla-almond flavor profile. While they look like they belong in a high-end professional bakery window, they are surprisingly achievable for the home baker. Whether you are prepping for a holiday cookie swap, a family gathering, or just looking for the perfect treat to leave out for Santa, these slice-and-bake cookies are guaranteed to be the star of the show.
The Secret Behind the Perfect Swirl: Key Ingredients
To achieve that professional look and a flavor that keeps everyone reaching for seconds, every ingredient plays a vital role. Here is what you will need for these show-stopping holiday cookies:
| Ingredient | The Role It Plays |
|---|---|
| Unsalted Butter | The foundation. Using unsalted allows you to control the sodium levels perfectly for a rich, creamy flavor. |
| Granulated Sugar | Provides sweetness and helps achieve those slightly crisp, golden edges. |
| Large Egg | Acts as the binding agent, giving the dough structure to be rolled without crumbling. |
| Pure Vanilla & Almond Extract | The “secret duo” that elevates the flavor profile to a professional bakery standard. |
| All-Purpose Flour | The backbone of the cookie. Ensure you measure accurately to avoid a dry or sticky dough. |
| Gel Food Coloring | Crucial for vibrant hues (Red and Green) without thinning out the dough consistency. |
| Nonpareil Sprinkles | Adds the final festive crunch and visual pop to the outer rim. |
Step-by-Step Instructions for Holiday Success
1. Cream the Base
In a large bowl, cream together the softened butter and granulated sugar until the mixture is light and fluffy. This aeration is key to a tender cookie crumb.
2. Incorporate Wet Ingredients
Add the egg and extracts. Beat on medium speed until fully combined, ensuring you scrape the sides of the bowl for an even flavor distribution.
3. Sift and Fold
Gradually add the all-purpose flour, baking powder, and salt. Mix just until the flour streaks disappear—do not overmix, as this can make the cookies tough instead of melt-in-your-mouth.
4. Divide and Color
Divide your dough into three equal portions. Leave one plain, and use gel food coloring to tint the others bright red and deep green. Knead until the pigment is uniform.
5. Roll, Stack, and Spiral
Roll each portion into a rectangle between sheets of parchment paper. Layer them (Green, White, Red), then roll tightly into a log. Press the log into festive sprinkles to coat the outside.
6. Chill and Bake
Chill the dough for at least 2 hours. This is the most important step for clean, sharp slices. Slice into 1/2 inch rounds and bake at 350°F (175°C) for 10–12 minutes.
Pro Tips for Perfection
- Temperature Control: If the dough gets too soft, pop it in the freezer. Cold dough prevents the colors from bleeding.
- The Sharp Knife Secret: Use a non-serrated, very sharp knife to get flawless circular shapes.
- Rotation: Rotate the log every few slices so you don’t flatten one side of the perfect spiral.
Serving Suggestions
These Christmas Pinwheel Cookies are a delight on their own, but you can elevate the experience:
- The Classic Pairing: Serve with creamy hot cocoa or a cold glass of milk.
- Holiday Platters: Mix them with dark chocolate truffles for a high-end dessert board.
- DIY Gifting: These are the best cookies for shipping because they hold their shape beautifully in gift tins.
Would you like me to generate a custom nutrition label or a list of variations for different holidays like Halloween or Easter?