Rich & Creamy Old-Fashioned Chocolate Fudge
There is nothing quite like the pure indulgence of **old-fashioned chocolate fudge**, the kind that melts slowly on your tongue and fills every bite with deep, nostalgic richness. This classic confection has been passed down through generations, beloved for its smooth, velvety texture and bold chocolate flavor. What makes this version truly irresistible is its simplicity—no complicated steps, no fancy equipment, just the timeless magic of **cocoa, sugar, and milk** brought together with care. If you’re looking for a homemade treat that delivers unmatched comfort and decadent flavor, this fudge will quickly become your go-to recipe.
Ingredients & Their Roles
Every ingredient in this recipe has a purpose. Here’s why each one matters and how it contributes to perfect fudge:
- 2/3 cup Hershey’s cocoa – Provides the deep, intense **rich chocolate flavor**. Cocoa powder adds complexity and creates the foundation of the fudge’s signature taste.
- 3 cups granulated sugar – Sweetens the mixture while assisting with **proper crystallization**, which gives the fudge its firm yet creamy texture.
- 1/8 tsp salt – A tiny addition that makes a big difference. Salt enhances the chocolate notes and balances overall sweetness.
- 1 1/2 cups milk – Adds moisture and creaminess while helping dissolve the sugar and cocoa into a smooth, luscious base.
- 1/4 cup butter (added at the end) – Gives the fudge a silky texture and rich mouthfeel.
- 1 tsp vanilla extract – Enhances depth and aroma, creating a warm, comforting finish.
Step-by-Step Instructions
Step 1: Prepare Your Pan
Line an 8×8 or 9×9 pan with parchment paper or lightly grease with butter. This ensures your fudge releases easily after it cools.
Step 2: Combine the Base Ingredients
In a heavy saucepan, whisk together the **cocoa**, **sugar**, and **salt**. Pour in the **milk**, stirring until everything is fully blended and no dry cocoa lumps remain.
Step 3: Bring to a Boil
Place the saucepan over medium heat. Stir continuously until the mixture begins to boil. Once boiling, stop stirring and allow it to cook until it reaches the **soft-ball stage (234°F / 112°C)**. This is crucial for the fudge to set correctly.
Step 4: Add Butter and Vanilla
Remove the mixture from heat. Immediately add the **butter** and **vanilla**, but do NOT stir. Allow it to rest for about 10 minutes untouched.
Step 5: Beat Until Thick and Glossy
After resting, beat the mixture vigorously with a wooden spoon until it thickens, loses some shine, and starts to hold its shape. This step creates that perfect **creamy, melt-in-your-mouth texture**.
Step 6: Pour and Set
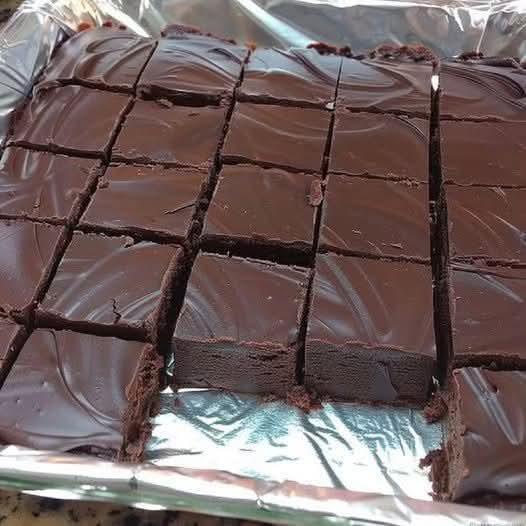
Quickly pour the fudge into your prepared pan and smooth the top with a spatula. Let it cool completely at room temperature before cutting into squares.
Why This Fudge Recipe Is Loved
- Delivers **intense chocolate flavor** using simple pantry ingredients.
- Has a perfectly balanced **creamy yet firm** texture.
- Requires no candy thermometer if you use the cold water soft-ball test.
- Feels nostalgic—just like grandma used to make.
- Stores beautifully, making it ideal for gifting or holiday treats.
Pro Tips for Perfect Fudge
- Use a heavy-bottomed pot to prevent scorching.
- Never stir once the mixture reaches a boil—this prevents graininess.
- If the fudge becomes too stiff while beating, add 1–2 tsp warm milk to loosen it.
- Allow it to cool undisturbed; movement can affect texture.
Serving Suggestions
Serve this **luxurious chocolate fudge** alongside:
- A hot cup of coffee or espresso
- Vanilla ice cream for contrast
- A holiday dessert platter with cookies, truffles, and candies
- Fresh berries for a pop of brightness
Conclusion
This **Old-Fashioned Chocolate Fudge** proves that the best desserts are sometimes the simplest. With everyday ingredients and straightforward steps, you can create a decadent, nostalgic treat that outshines store-bought fudge every time. Whether you’re gifting it, sharing it at gatherings, or sneaking a square for yourself, this recipe delivers unmatched flavor and satisfaction. Make it once, and it will instantly become a cherished staple in your kitchen.